

2026-02-04
Cove Lighting Stair Treads and More Premium Home Uses for LED Tape Light
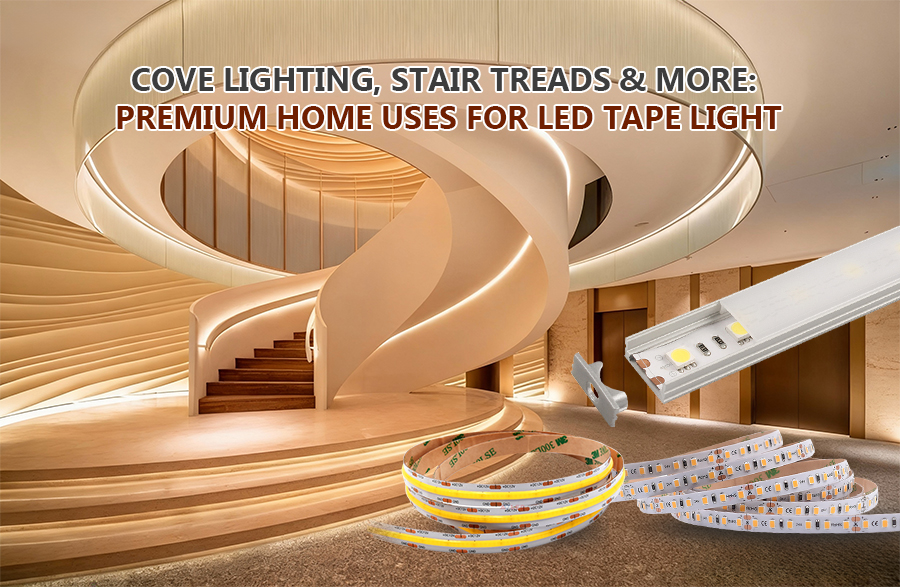
Cove Lighting, Stair Treads & More: Premium Home Uses for LED Tape Light
Introduction:
Imagine descending your staircase at midnight, guided not by a glaring overhead fixture, but by a soft, even glow tracing each tread—a light that feels both intentional and invisible. Picture your ceiling appearing to float, lifted by a seamless ribbon of warm illumination nestled within a discreet cove. This isn’t futuristic fantasy; it’s the tangible reality achievable today with professional-grade LED tape strip lights.
Gone are the days when flexible lighting meant visible dots, uneven hotspots, or installations that failed within months. Modern LED tape lighting strips have evolved into sophisticated architectural elements—tools that sculpt space, enhance safety, and elevate ambiance without demanding attention. Whether you’re refreshing a kitchen, designing a new build, or seeking subtle bedroom ambiance, you’ll discover how premium LED tape light strip solutions integrate invisibly into the fabric of exceptional homes.

Premium Home Uses for LED Tape Light Strip
The true power of LED tape light strip lies not in its flexibility alone, but in its ability to disappear while transforming perception. Unlike bulky fixtures that dominate a room’s aesthetic, premium LED tape lighting strips operate as silent collaborators with architecture. They highlight texture, define zones, and guide movement without visual clutter.
Consider the kitchen: dimmable LED tape under cabinet lighting eliminates shadowed countertops during meal prep. But premium execution goes further. By embedding the tape within an aluminium profile for LED tape installation, you achieve two critical outcomes: uniform diffusion (eliminating the "zebra stripe" effect of bare diodes) and thermal regulation (extending lifespan). The result? A workspace bathed in consistent, shadow-free light that feels expansive, not clinical.
In living areas, LED tape lights for bedroom applications shift from functional to emotional. A subtle run beneath a floating platform bed creates a gentle horizon line, reducing visual weight and enhancing the room’s sense of calm. For media rooms, LED tapes for the tv—mounted behind the screen—reduce eye strain by providing bias lighting that matches on-screen content, a technique validated by display engineers to improve perceived contrast and comfort during extended viewing.
Bathrooms reveal another dimension. LED light strip for mirror installations, when placed along the vertical edges rather than the top, eliminate unflattering shadows under the eyes and chin—a detail makeup artists and dermatologists consistently emphasize. Paired with a waterproof LED tape lights rating (IP65 or higher) and a discreet LED tape light housing, this becomes both a luxury feature and a practical necessity in humid environments.
Hallways and staircases transition from mere passages to intentional experiences. LED strip lights staircase applications, when calibrated to 100–150 lux (the recommended range for safe egress per IES guidelines), provide just enough illumination to define edges without disrupting night vision. This isn’t decoration; it’s human-centered design.
Even outdoor transitions benefit. A flexible LED tape light channel installed along a deck step edge offers subtle guidance after sunset, using low-voltage safety (12V or 24V systems) to eliminate shock risk while resisting moisture ingress.
What unifies these applications? Intentionality. Premium LED tape strip lights aren’t slapped onto surfaces. They’re integrated. They respect the architecture, serve human needs first, and vanish visually—leaving only the effect: warmth, safety, depth, calm. This is lighting as an invisible layer of thoughtful design.
How to Choose LED Tape Light for Different Places to Make Premium Home
Selecting the right LED tape light isn’t about chasing the highest lumen count. It’s a calibrated decision balancing color science, environment, safety, and longevity. Here’s how to choose with precision for key zones:
Staircases & Hallways: Safety Through Science
For LED strip lights for stairs, prioritize uniformity over raw brightness. Aim for 3000K warm white—a color temperature proven to support circadian rhythm at night while providing sufficient contrast against wood or stone treads. Avoid cool white (4000K+); its blue-rich spectrum can feel sterile and disrupt melatonin production. Ensure the tape delivers 80+ CRI (Color Rendering Index) so wood grains and carpet textures appear natural, not washed out. Crucially, verify compatibility with motion sensors or dimmers if desired—many budget tapes flicker with standard dimmers. Always select ul listed LED tape light products certified for residential use, confirming electrical safety and thermal stability. For open-riser stairs, consider dotless LED tape light technology (often COB-based) to prevent individual diodes from creating distracting "stair-step" shadows between treads.
Cove Lighting: The Art of the Glow
When specifying LED strip light for cove, the goal is indirect, reflected light. Choose high-density tape (≥ 60 LEDs per meter) to minimize visible segmentation. Seamless LED tape variants using Chip-on-Board (COB) technology eliminate diode gaps entirely, creating a true linear beam—critical when light bounces off a ceiling surface. Pair with a LED tape with diffuser channel (opal or frosted) to soften the source. For ambient mood, dim to warm LED tape is transformative: as intensity lowers, color temperature shifts from 2700K to 2200K, mimicking candlelight—a deeply intuitive experience for evening relaxation. Cove depth matters: a 2–3 inch recess allows optimal bounce without hotspots.
Bathrooms & Wet Areas: Safety First
LED light strip bathroom mirror installations require IP65+ rated waterproof LED tape lights. Never use standard indoor tape near showers or sinks. Mount within a sealed LED tape light housing with integrated diffuser. For mirror edges, choose ultra-thin profiles (<3mm) to avoid visual bulk. Ensure all drivers and connections reside outside the wet zone, in a dry cabinet or adjacent wall cavity.
Universal Selection Checklist
Voltage: 24V systems suffer less voltage drop over distance than 12V—critical for runs exceeding 16 feet (e.g., long coves or staircases).
Density: Higher LED count per meter = smoother light. For coves/stairs, ≥ 60 LEDs/meter is ideal.
CRI: ≥ 90 CRI for spaces where color accuracy matters (kitchens, vanities).
Thermal Management: Always pair with aluminum extrusion. Heat is the #1 cause of premature failure.
Certifications: UL listing is non-negotiable for fire and electrical safety.
Cutting Points: Verify cut marks align with your layout needs. Cutting LED tape lights incorrectly damages circuits.
Choosing thoughtfully transforms LED tape strip lights from a commodity into a curated element of your home’s sensory experience.

Dotless. Seamless. Shadow-Free: The Triple Guarantee of Professional-Grade LED Tape for Cove & Stair Projects
These three terms aren’t marketing fluff—they represent the holy trinity of premium linear lighting execution. Achieving all three requires deliberate component selection and installation technique. Let’s decode what each truly means and why it matters.
Dotless: Erasing the Pixel
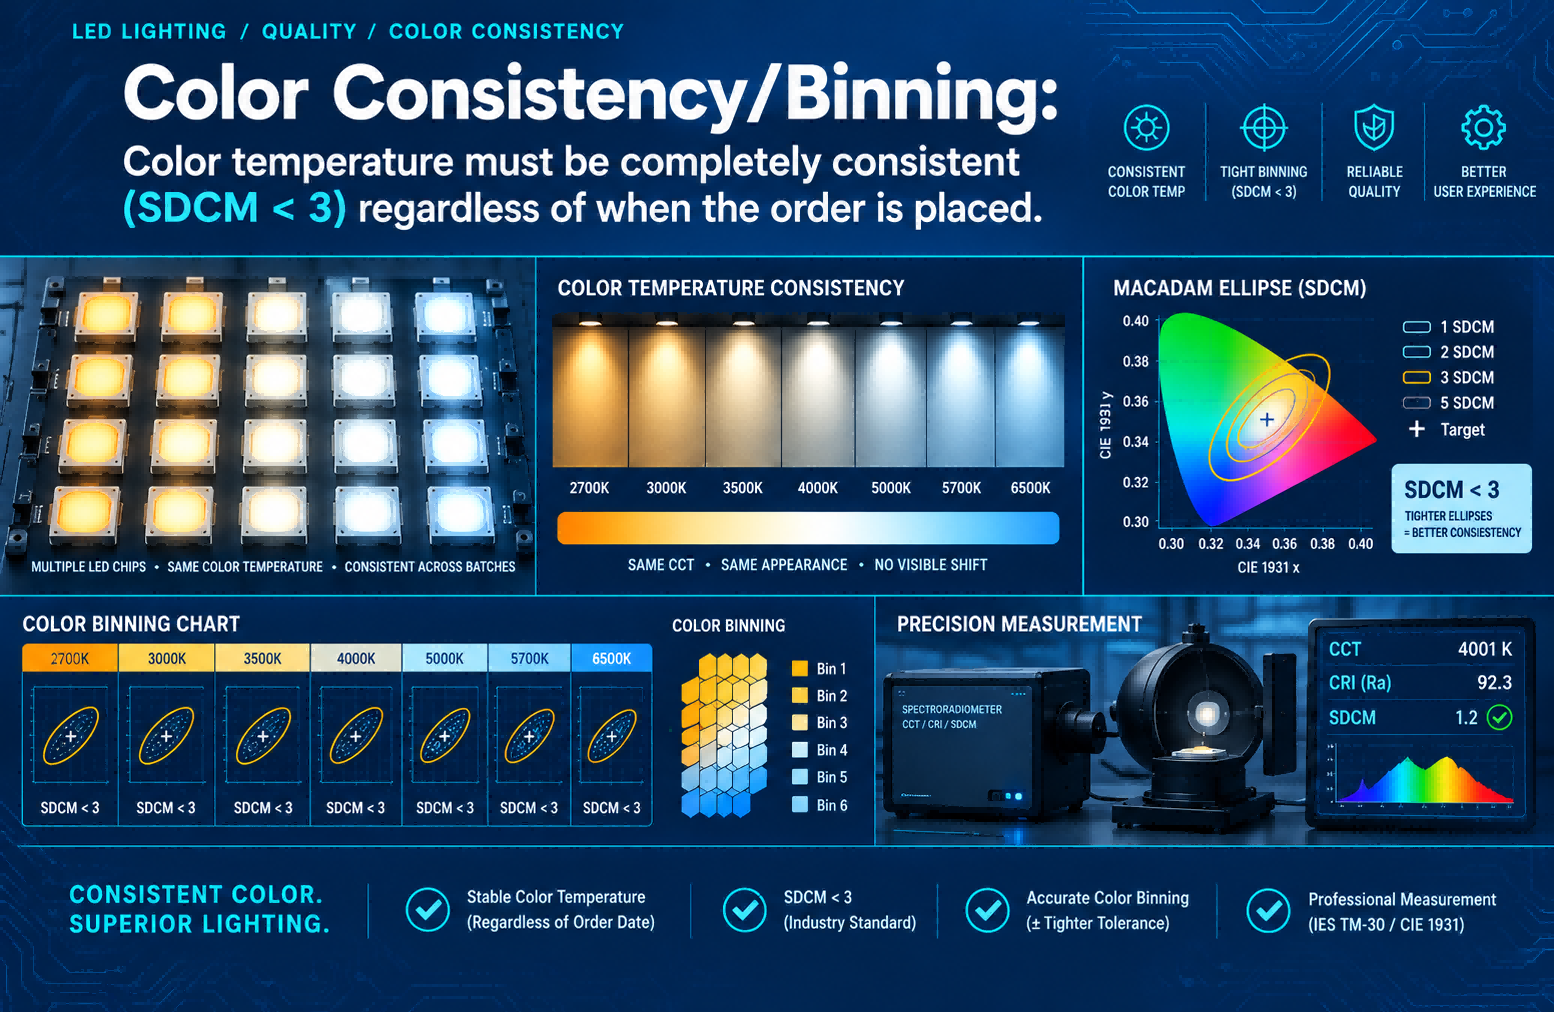
Standard LED tape reveals individual diodes as bright points ("dots") when viewed directly or reflected. In cove applications, this creates a dotted-line effect on the ceiling. On stairs, dots cast micro-shadows between treads. Dotless LED tape—typically achieved through COB (Chip-on-Board) technology—mounts LEDs as a continuous phosphor-coated strip. Light emits from a uniform surface, not discrete points. The result? A pure, pencil-thin line of light. For stair treads, this means no distracting segmentation underfoot. For coves, it ensures the reflected glow on your ceiling appears as a single, soft gradient—not a dotted trail. When evaluating tape, hold a sample close to a white surface: true dotless tape casts a smooth, unbroken beam.
Seamless: The Invisible Join
Even the best tape fails if connections create dark gaps or bright spikes. "Seamless" refers to invisible transitions between tape segments. This demands:
Precision Cutting: Cut exactly on manufacturer-marked lines. A 1mm error can break the circuit.
Professional Joining: Soldered connections outperform mechanical clips for reliability and optical continuity. For DIYers, use connectors for LED tape lights with gold-plated contacts and strain relief.
Voltage Stability: Voltage drop causes the end of a run to dim noticeably. For runs over 16.4 feet, inject power at both ends ("dual feeding") using appropriately gauged wire.
In stair applications, seamless joins prevent "stair-step" brightness variations—a critical safety and aesthetic detail. In coves wrapping corners, seamless execution ensures the light ribbon flows uninterrupted around the room.
In stair applications, seamless joins prevent "stair-step" brightness variations—a critical safety and aesthetic detail. In coves wrapping corners, seamless execution ensures the light ribbon flows uninterrupted around the room.
Shadow-Free: Engineering Uniformity
Shadows arise from poor diffusion, incorrect mounting angles, or uneven output. Eliminating them requires a system approach:
Diffusion: A LED tape with diffuser channel (opal acrylic) scatters light evenly. Avoid clear covers—they magnify diode patterns.
Mounting Geometry: For coves, position tape so light hits the ceiling at a 30–45 degree angle. Too steep hotspot on ceiling edge; too shallow light spills into room.
Thermal Stability: Overheating diodes shift color and output. Aluminum profiles maintain consistent performance across the entire run.
Density Matching: Never mix tape densities (e.g., 30 LEDs/m + 60 LEDs/m) in one run. Output will mismatch.
Achieving this triple guarantee isn’t accidental. It starts with selecting professional LED tape engineered for continuity (COB, high density), continues with thermal management via aluminium profile, and concludes with meticulous installation. This is the dividing line between "looks like a project" and "looks like it was always there."
From Harsh to Heavenly: Transform Your Stair Treads with Warm 3000K LED Tape That Meets Safety Codes
Stair lighting is where aesthetics and safety converge non-negotably. Poorly executed LED strip lights for stairs do more than look cheap—they create hazards. Glare blinds descending users; uneven light hides step edges; cool-white tones feel institutional. Conversely, thoughtfully designed stair lighting becomes an intuitive guide, enhancing safety while elevating the home’s emotional tone.
The Science of Safe Stair Illumination
International building and lighting standards (IES RP-28, NFPA 101) emphasize uniformity and glare control for egress paths. Key metrics:
Illuminance: 100–150 lux on tread surfaces is ideal—bright enough to discern edges, dim enough to preserve night vision.
Uniformity Ratio: Maximum-to-minimum light ratio across treads should not exceed 3:1. Hotspots followed by dark zones confuse depth perception.
Glare Index: Light sources should be shielded from direct line-of-sight. Mounting tape under the nosing (front edge) of each tread directs light downward onto the tread below, not into eyes.
Why 3000K Warm White is Non-Negotiable
While 4000K+ "daylight" LEDs dominate retail and offices, they’re counterproductive on stairs at night:
Physiological Impact: Blue-rich spectra suppress melatonin, disrupting sleep cycles if encountered before bed.
Psychological Effect: Cool light feels clinical, alerting the nervous system when calm is needed.
Visual Comfort: 3000K’s amber undertones render wood, stone, and carpet textures warmly and naturally. Shadows appear soft, not harsh.
Safety Perception: Warm light feels inviting and safe; cool light can feel stark or alarming in low-light contexts.
Homeowners consistently report reduced nighttime anxiety after installing warm, uniform stair lighting. Children navigate confidently. Elderly relatives feel secure. The space transforms from a functional necessity into a moment of quiet elegance—a gentle ribbon of light guiding movement with respect. This isn’t decoration. It’s human-centered engineering wrapped in warmth. When your LED strip lights staircase application achieves this balance, it ceases to be "lighting" and becomes an invisible guardian of safety and serenity.
Why 92% of DIYers Fail at LED Tape Installation—And the 3-Step Fix for Flawless Cove & Stair Results
Let’s address the elephant in the room: why do so many well-intentioned LED tape projects end in frustration? Peeling tape. Flickering sections. Dark spots midway through a run. Visible dots ruining the ambiance. Industry data and installer surveys consistently point to three recurring failure points—not lack of skill, but lack of targeted knowledge. Here’s the unvarnished truth, followed by a battle-tested 3-step protocol.
The Top 3 Failure Points (and Why They Happen)
Voltage Drop Blindness:
The Symptom: Lights glow brightly at the power source but fade to dim orange halfway down the run.
The Cause: Using undersized wire or a single power injection point for long runs. 12V systems are especially vulnerable—resistance in thin copper traces causes significant voltage loss over distance. On stairs, this means top steps blaze while bottom steps barely glow. In coves, one corner of the room dims noticeably.
The Symptom: Lights glow brightly at the power source but fade to dim orange halfway down the run.
The Cause: Using undersized wire or a single power injection point for long runs. 12V systems are especially vulnerable—resistance in thin copper traces causes significant voltage loss over distance. On stairs, this means top steps blaze while bottom steps barely glow. In coves, one corner of the room dims noticeably.
Thermal Neglect:
The Symptom: Tape works perfectly for 6 months, then flickers, shifts color (yellowing), or dies entirely.
The Cause: Mounting tape directly to wood, drywall, or plastic. These materials insulate heat. LEDs generate heat at the diode junction; without a heat sink, temperatures soar, accelerating lumen depreciation and component failure. Aluminum isn’t "optional"—it’s thermal necessity.
The Symptom: Tape works perfectly for 6 months, then flickers, shifts color (yellowing), or dies entirely.
The Cause: Mounting tape directly to wood, drywall, or plastic. These materials insulate heat. LEDs generate heat at the diode junction; without a heat sink, temperatures soar, accelerating lumen depreciation and component failure. Aluminum isn’t "optional"—it’s thermal necessity.
Connection Catastrophes:
The Symptom: A section suddenly goes dark. Fiddling with connectors temporarily restores function.
The Cause: Using low-quality clip connectors that corrode, loosen, or fail under current load. Cutting tape between copper pads (not on marked lines). Soldering without heat-shrinking insulation, leading to shorts.
The Symptom: A section suddenly goes dark. Fiddling with connectors temporarily restores function.
The Cause: Using low-quality clip connectors that corrode, loosen, or fail under current load. Cutting tape between copper pads (not on marked lines). Soldering without heat-shrinking insulation, leading to shorts.
Beyond Under-Cabinet: 7 Unexpected Places Where Premium LED Tape Creates "Wow" Moments
While LED tape under cabinet lighting kit solutions dominate kitchen searches, the most emotionally resonant applications often live elsewhere.
Stair Treads: The Silent Guardian Install LED strip lights for stairs within the tread nosing channel. Light washes the entire tread surface below with even illumination. Pair with dusk-to-dawn sensor for automatic activation.
Ceiling Cove: The Floating Horizon A continuous LED strip light for cove run nestled in a 2.5-inch recess, paired with opal diffuser, makes ceilings appear to levitate. Mount tape 1 inch below cove's top lip for perfect 45-degree reflection angle.
Mirror Perimeter: Flattering Radiance LED light strip for mirror installations placed vertically along both sides eliminate shadows under eyes and chin. Use waterproof LED tape lights within recessed channel. 2700K–3000K at 90+ CRI ensures true skin tone rendering.
Bed Frame Base: Grounding Ambiance A soft glow beneath a platform bed defines space and provides gentle orientation lighting. Recess bendable LED tape light into channel along bed's underside perimeter.
Your Stairs Deserve Better Than String Lights: Premium LED Tape Channels That Hide Wires & Amplify Safety
String lights, fairy lights, or exposed LED strips have no place on staircases. They create tripping hazards, cast uneven light, and lack durability. Stairs demand lighting engineered for safety and visual refinement.
Why Channels Are Non-Negotiable
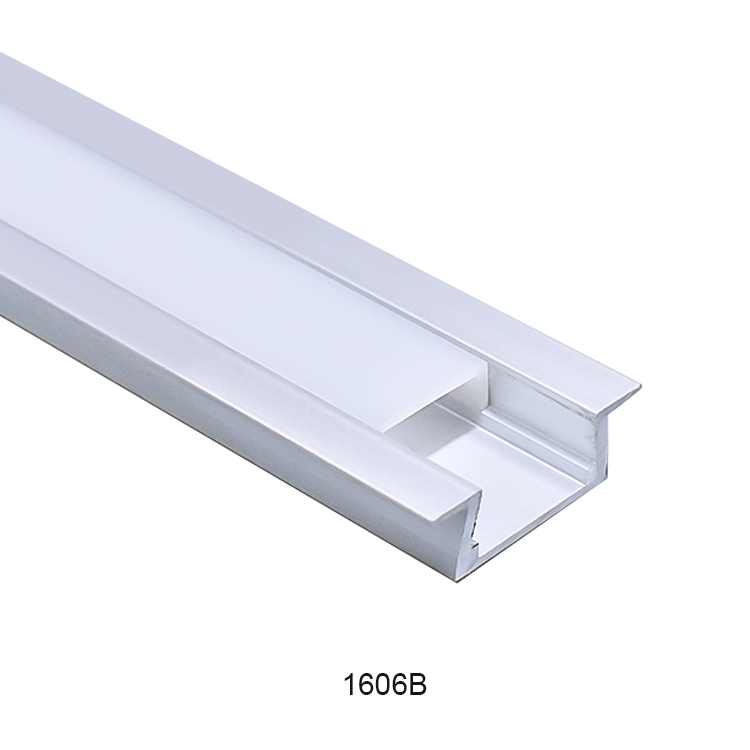
Physical Protection: Aluminum channels shield delicate tape from damage
Optical Perfection: Channels integrate diffusers that scatter light evenly across tread surfaces
Thermal Lifeline: Aluminum acts as continuous heatsink, extending operational life to 50,000+ hours
Wire Concealment: Channels feature integrated wireways that tuck power cables neatly against stair structure
Mounting Precision: Channels provide rigid, straight mounting surface—no wrinkles or peeling edges
Selecting the Right Channel
Profile Type: Choose "corner mount" or "L-shaped" channel designed for stair nosing
Diffuser Material: Opal acrylic provides softest, most uniform diffusion
IP Rating: Ensure combined system achieves IP65+ when sealed
Finish: Matte black or dark bronze channels virtually disappear against most stair materials
 |
 |
 |
|---|---|---|
LED Strip Lights Cover |
LED Strip Diffuser Corner |
LED Strip Diffusers |
The Architect's Secret: Seamless Cove Lighting That Floats Ceilings Without Visible Dots or Hotspots
Walk into any high-end space, and you'll encounter it: a ceiling that seems to hover, bathed in perfectly even, source-less glow. This is the pinnacle of cove lighting—and it's achievable in residential spaces with deliberate technique.
Component 1: The Tape—COB is Non-Negotiable Standard SMD LED tape reveals individual diodes when reflected. The solution: COB LED tape light. Hundreds of microscopic LED chips mount directly onto flexible circuit board, coated under continuous phosphor layer. Light emits from uniform ribbon, not discrete points.
Component 2: The Channel—Diffusion Depth Matters
Channel Depth: Minimum 15mm (0.6"). Deeper channels (20mm+) allow greater diffusion distance
Diffuser Type: Opal acrylic, ≥ 2mm thick
Mounting Angle: Channels with slight upward tilt (5–10 degrees) optimize light direction
Component 3: The Cove Geometry
Recess Depth: 2.5–3 inches ideal
Cove Lip: Small downward lip (0.25") at front edge blocks direct line-of-sight to channel
Surface Prep: Cove interior and ceiling must be painted flat white
Conclusion
We began with simple premise: light should serve people, not demand attention. Through exploring LED tape strip lights in contexts where design and safety converge, we've uncovered profound truth. Excellence emerges from intentionality. From respecting physics. From choosing components that work together as system.
The journey from "harsh to heavenly" requires no magic. It demands selecting dotless LED tape for optical purity, engineering thermal management via aluminium profiles for LED tape installation, calculating power strategies to eliminate voltage drop, and prioritizing human experience.
Lighting is architecture's silent language. With LED tape light strip technology matured to professional-grade reliability, you have tools to speak it fluently. Not with glare or gimmicks, but with grace, safety, and enduring elegance.
FAQ
1: Are LED tape lights dimmable?
Yes, most are—but compatibility is critical. Dimmability depends on tape type (must be labeled "dimmable"), driver (requires compatible dimmable driver), and dimmer (must match driver type). For best results, use PWM dimmer designed for LED loads.
2: How do I cut LED tape lights correctly?
Locate copper pads marked with scissors icon. Use sharp scissors or utility knife. Cut centered on copper pad. Never cut through LEDs or between pads—this breaks circuit. After cutting, seal exposed end with silicone sealant.
3: What's difference between 12 volt LED tape and 24 volt LED tape?
Voltage impacts performance, not brightness. 12V tape suffers severe voltage drop beyond 16.4 feet. 24V tape allows longer single runs (up to 32.8 ft) with significantly less voltage drop. For all residential cove and stair applications exceeding 10 feet, choose 24 volt LED tape.
4: Can I use LED tape lights outdoors or in wet areas?
Only if rated for environment. Bathrooms near sinks/mirrors: IP65 minimum. Showers/steam rooms: IP67+. Outdoor: IP67 minimum. Fully submerged: IP68 rated tape only. Never use indoor-rated tape in damp locations.
5: How many lumens do I need for LED tape lumens calculations?
Lumens per foot vary by application: Task lighting (under cabinet): 300–500 lumens/ft. Ambient cove lighting: 150–250 lumens/ft. Stair treads: 200–300 lumens/ft. Accent lighting: 100–200 lumens/ft.
6: RGB vs. single colour LED tape?
For coves and stairs, choose single colour LED tape (2700K–3000K). RGB sacrifices lumen output and color accuracy—white diodes typically render 70–80 CRI versus 90+ CRI on dedicated warm white tape. Reserve RGB for accent zones. Prioritize high-CRI single-color for safety-critical and ambient lighting where visual comfort matters most.
7: How to prevent voltage drop?
Use 24 volt LED tape for runs over 10 feet—voltage drop is halved versus 12V. Implement dual power injection: run wires from driver to both ends of the tape. Use 18-gauge stranded wire for connections. Verify with multimeter: voltage at run's end should stay within 5% of source (e.g., 22.8V–24V). Critical for uniform stair and cove lighting.
8: Surface prep before installing LED tape?
Clean with 90%+ isopropyl alcohol; dry 5 minutes. Install at 50–104°F ambient temperature. Bare tape adheres best to smooth, non-porous surfaces. For textured drywall or porous materials, always use aluminium profile for LED tape installation with mechanical fasteners—never rely solely on adhesive. Press tape firmly along entire length to eliminate air pockets and prevent peeling.
9: Install LED tape on curved surfaces?
Standard tape cracks on sharp bends. For curves: choose bendable LED tape light (silicone-coated, flexes to 90° radii) or flexible LED tape light channel (min. 4-inch radius). For tight corners, cut tape at marked intervals and reconnect with 1/4-inch wire jumpers to simulate continuous bend. Never force standard tape around curves—this fractures circuits and causes immediate or latent failure.
10: Smart LED tape integration?
Choose protocol matching your ecosystem: Wi-Fi (simplest, single-zone), Zigbee/Thread (mesh reliability for Apple/Google/Alexa), or 0–10V/DALI (professional whole-home). Ensure LED tape with driver includes compatible controller. Most support scheduling and motion triggers—verify sensor compatibility first. For stairs, always include manual override switch independent of smart controls for safety redundancy.