2026-03-04
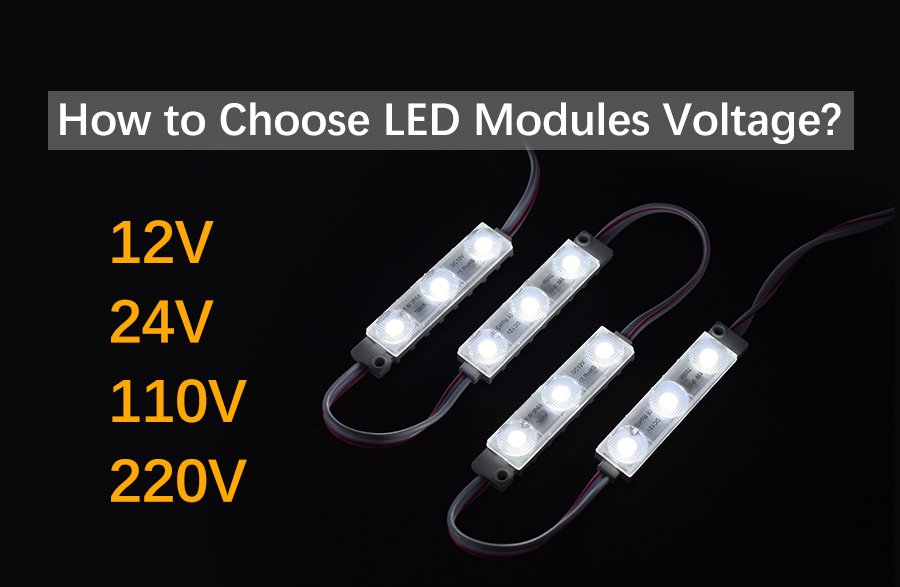
How to Choose LED Modules Voltage 12V 24V 110V or 220V
How to Choose LED Modules Voltage: 12V, 24V, 110V or 220V?
Understanding the Basics: AC vs. DC and LED Technology
Low Voltage Options: 12V and 24V LED Modules
High Voltage Options: 110V and 220V LED Modules
Detailed Comparison: 12V vs 24V vs 110V vs 220V
How to Choose the Right Voltage for Your Project
Practical Considerations for Installation
Conclusion
FAQ
Choosing the correct voltage for LED modules is one of the most critical decisions in any lighting project. Whether you are a DIY enthusiast installing under-cabinet lighting, an electrician wiring a commercial building, or a procurement manager sourcing materials for a large-scale hotel, the voltage question is unavoidable. The market offers four common options: Low Voltage DC (12V and 24V) and High Voltage AC (110V and 220V).
Selecting the wrong voltage can lead to immediate failure, safety hazards like electrical shocks or fires, poor light quality due to voltage drop, or significantly shortened lifespan of the LEDs. This comprehensive guide will walk you through the technical differences, safety implications, installation complexities, and ideal applications for each voltage type, ensuring you make an informed decision that balances performance, safety, and budget.
Understanding the Basics: AC vs. DC and LED Technology
Before diving into specific voltages, it is essential to understand the fundamental nature of electricity and how LEDs work. LEDs (Light Emitting Diodes) are inherently DC (Direct Current) components. They require a constant, steady flow of current in one direction. A standard LED chip, depending on its color and chemistry, typically requires a forward voltage (Vf) of around 2.0 to 3.5 Volts DC to operate.
This creates our first major division: High Voltage (HV) LED modules (110V/220V) are designed to run directly on AC (Alternating Current) mains power, while Low Voltage (LV) modules (12V/24V) require a transformer or driver to convert AC mains into safe, regulated DC power.
Low Voltage Options: 12V and 24V LED Modules
Low voltage LED modules are the industry standard for most indoor, residential, and commercial accent lighting. They are favored for their safety, flexibility, and light quality.
12V LED Modules: The Versatile Standard
12V is arguably the most common voltage for LED strip lights and small modules. Its popularity stems from its widespread availability and safety profile.
How 12V Modules Work:
To use a 12V module, you must plug it into a 12V DC power supply (often called a driver or transformer), which is connected to your mains electricity (110V or 220V). The internal circuitry of a 12V module typically arranges LEDs in parallel circuits of 3 LEDs in series. Since a single LED needs about 3.0V, three in series totals roughly 9V. The remaining voltage is handled by a current-limiting resistor to ensure the LEDs receive the correct current and don't burn out.
Advantages of 12V:
High Safety (SELV): 12V is classified as Safety Extra-Low Voltage (SELV). In normal conditions, it poses no risk of lethal electric shock, making it safe to touch even when wet. This is ideal for homes with children and pets, as well as damp locations like bathrooms or kitchens.
High Flexibility: 12V strips can typically be cut every 2.5cm to 5cm (every 3 LEDs), allowing for precise fitting in small spaces and tight corners.
Superior Light Quality: Because it runs on smooth DC power, 12V lighting is inherently flicker-free, which is easier on the eyes and critical for video applications. It is also highly compatible with PWM (Pulse Width Modulation) dimmers, allowing for smooth, 0-100% dimming.
Disadvantages of 12V:
Severe Voltage Drop: This is the biggest drawback of 12V. Because the voltage is low, the current required to deliver the same power is higher (Ohm‘s Law: Current = Power/Voltage). This high current causes a significant voltage drop along the length of the strip. If you run a 12V strip beyond 5 meters (16 feet) from a single power feed point, the LEDs at the far end will be noticeably dimmer and have a color shift compared to the ones near the power source.
Higher Installation Cost: For large projects, the need for multiple power injection points or shorter runs means you may need to purchase several power supplies, increasing the overall system cost.
24V LED Modules: The Long-Run Champion
24V is rapidly gaining popularity, especially for professional installations. It offers a significant upgrade in terms of power distribution while maintaining the safety benefits of low voltage.
How 24V Modules Work:
24V modules are designed with longer series circuits. They typically connect 6 LEDs in series (6 x 3.0V = 18V), again using a resistor to manage the remaining voltage . This design is key to its advantages.
Advantages of 24V:
Reduced Voltage Drop: This is the primary reason to choose 24V. By doubling the voltage, the current is halved for the same power load compared to 12V. This allows 24V strips to run much longer—typically up to 10 meters (33 feet) or more without visible dimming, compared to just 5 meters for 12V.
Better Efficiency: The lower current reduces the load on the PCB traces, leading to less energy lost as heat and slightly better overall system efficiency.
Larger Cutting Intervals: While less granular than 12V, 24V strips usually cut every 5cm to 10cm (every 6 LEDs), which is still perfectly adequate for most applications.
Same Safety Profile: Like 12V, 24V is still considered SELV and is safe to touch and use in damp environments.
Disadvantages of 24V:
Less Common for DIY: The vast ecosystem of inexpensive controllers and accessories is still heavily focused on 12V.
Compatibility: You must ensure your controller, dimmer, and power supply are all 24V. Mixing 12V and 24V components can destroy the LEDs.
High Voltage Options: 110V and 220V LED Modules
High Voltage LED modules are designed for a different set of challenges. They excel in large-scale, long-distance installations where running multiple low-voltage power supplies would be impractical and expensive.
110V / 120V and 220V / 240V Modules: The Long-Distance Specialists
These modules are often referred to as "high voltage LED strips" or "direct-wire" strips. They are designed to be connected directly to mains electricity (after a rectifier, which is usually included with the strip).
How High Voltage Modules Work:
HV strips contain a built-in rectifier (often just a few diodes) to convert the incoming AC power to DC. They also arrange a large number of LEDs in long series strings to create a total voltage that matches the mains supply. For example, a 220V strip might have 60 or more LEDs in a single series circuit, along with surface-mounted resistors to regulate current.
Advantages of 110V/220V:
Extremely Long Runs: Because they operate at high voltage, the current is very low. This effectively eliminates the issue of voltage drop. You can run a single 220V LED strip for 50 meters (164 feet) or even 100 meters from one end, and the brightness will be perfectly uniform throughout.
Simpler System Architecture: For large projects like architectural outlines or facade lighting, you can simply wire the strips in series directly from the mains, similar to how Christmas lights are connected. This eliminates the need for multiple, bulky 12V/24V power supplies scattered throughout the installation.
Lower Upfront Cost for Large Projects: By removing the need for numerous DC transformers, the initial component cost for a large installation can be significantly lower.
Disadvantages of 110V/220V:
Serious Safety Risk: This is the most important disadvantage. 110V and 220V are lethal voltages. These strips pose a serious shock hazard and must be treated with the same respect as any other mains-powered appliance. They are not suitable for locations where people or animals can touch them, such as under cabinets, handrails, or in pools. Installation should ideally be performed by a qualified electrician.
Large Cutting Units: Unlike low voltage strips, you cannot cut HV strips wherever you want. The cutting points are typically every 0.5 meters (for 110V) or 1 meter (for 220V). This makes precise fitting for smaller projects difficult.
Potential for Flicker: Cheaper HV strips or those with poor-quality rectifiers can exhibit noticeable 50Hz or 60Hz flicker, which can cause eye strain and headaches. While not always visible to the naked eye, it is often apparent when recording video.
Shorter Lifespan: The higher voltage creates more stress on the components and often leads to higher heat generation per unit length compared to well-designed low-voltage systems, potentially reducing the overall lifespan.
Lack of Dimming Compatibility: Dimming high voltage AC LED strips is more complex and expensive than dimming 12V/24V DC strips, and compatibility with standard household dimmers is not guaranteed.
Detailed Comparison: 12V vs 24V vs 110V vs 220V
To make the best choice, it helps to see all the options side-by-side. The following table summarizes the key characteristics of each voltage.
|
Feature
|
12V DC Low Voltage
|
24V DC Low Voltage
|
110V / 220V AC High Voltage
|
|---|---|---|---|
|
Safety
|
Excellent (SELV). Safe to touch. Ideal for homes, children's areas, and damp locations.
|
Excellent (SELV). Same high safety as 12V.
|
Poor. Lethal voltage. High risk of electric shock. Must be kept out of reach.
|
|
Max. Run Length
|
Short (~5m / 16ft). Heavily affected by voltage drop. Requires parallel wiring for longer runs.
|
Medium (~10m / 33ft). Twice the run length of 12V with half the voltage drop.
|
Very Long (50-100m). Virtually no voltage drop. Ideal for long, continuous runs.
|
|
Cutting Interval
|
Very Flexible (e.g., 2.5cm / 1"). Allows for precise customization.
|
Flexible (e.g., 5cm / 2"). Good balance of flexibility and power handling.
|
Inflexible (0.5m or 1m). Difficult to fit to exact small sizes.
|
|
Installation
|
Moderate. Requires a DC power supply for each zone. Susceptible to voltage drop.
|
Moderate. Requires a DC power supply. Less concern about voltage drop than 12V.
|
Simple (for pros). Direct mains connection. No external driver needed, but professional installation is highly recommended.
|
|
Best Applications
|
Under-cabinet lighting, accent walls, task lighting, DIY projects, automotive, displays.
|
Large coves, long kitchen runs, commercial display cases, architectural details, outdoor signs.
|
Building outlines, facade lighting, large signage, long perimeter lighting in warehouses, permanent roof eave lights.
|
How to Choose the Right Voltage for Your Project
Now that we understand the strengths and weaknesses of each voltage, let's create a practical decision-making framework.
Step 1: Assess the Installation Environment
Safety is always the first priority. Ask yourself: Can people or animals touch the LED module or its wiring during normal use?
YES, it is within reach: You must choose 12V or 24V. This includes kitchen counters, bathroom mirrors, shelves, handrails, and children's bedrooms. The risk of electrocution from low voltage is virtually zero.
NO, it is out of reach: If the lighting will be installed in a high ceiling cove, on a rooftop facade, or behind a securely locked panel where only maintenance personnel have access, then 110V or 220V becomes a viable and often better option.
Step 2: Calculate the Required Run Length
Next, consider the distance the LED strip needs to cover from a single power source.
Under 5 meters (16 feet): 12V is a perfectly fine and cost-effective choice.
Between 5 and 10 meters (16-33 feet): This is the sweet spot for 24V. You get the safety and flexibility of low voltage without the headache of voltage drop.
Over 10 meters (33 feet) and up to 100 meters: You are now in the territory of 110V or 220V high voltage strips. Using 12V or 24V for runs this long would require complex power injection schemes and multiple power supplies, making HV the simpler and often cheaper solution.
Step 3: Evaluate Light Quality and Control Needs
Consider how you will use the light. Will you be dimming it frequently? Is it for a space where you relax, like a living room?
For superior dimming and flicker-free operation: Choose 12V or 24V. These systems offer the widest compatibility with smart dimmers and provide the most stable, eye-friendly light.
For basic on/off or simple switching: 110V/220V can suffice. Be aware that if you try to dim them, you may encounter flicker or limited dimming range unless you purchase specialized (and often expensive) high-voltage dimmers.
Step 4: Analyze the Total System Cost
Don't just look at the price per meter. Consider the cost of the entire system.
For a small, single room project (e.g., kitchen island) , the cost of one 12V or 24V power supply is negligible, so low voltage is cheaper overall.
For a large project (e.g., lighting the facade of a hotel) , the cost of dozens of 12V/24V power supplies will quickly outweigh the slightly higher per-meter cost of HV strips. In this case, 110V/220V will have a much lower total system cost.
Practical Considerations for Installation
Addressing Voltage Drop in 12V/24V Systems:
If you must run a low-voltage strip longer than its recommended maximum, you can overcome voltage drop by:
1.Parallel Power Injection: Instead of powering the strip from just one end, run additional wires from the power supply to the middle or far end of the strip. This "injects" fresh 12V/24V current and ensures even brightness.
2.Using a Higher Gauge Wire: Thicker wire has less resistance. Using thicker copper wires for your power leads can help maintain voltage over slightly longer distances.
Sizing Your Power Supply (Transformer):
This applies to all 12V and 24V systems.
1.Calculate the total wattage of your LED module (e.g., 10 watts/meter * 5 meters = 50 watts).
2.Apply the 80% rule. A power supply should never run at 100% load continuously. Add a safety margin of at least 20%.
3.Formula: Total LED Wattage x 1.2 (for 20% headroom) = Minimum Power Supply Wattage. For the 50W example, you would need a 60W power supply.
Conclusion
Choosing between 12V, 24V, 110V, and 220V LED modules is not about finding a "one-size-fits-all" solution, but rather matching the technology to the specific demands of your project.
For most indoor residential applications where safety, flexibility, and light quality are paramount, 12V and 24V are the undisputed champions. 12V offers maximum flexibility for short runs, while 24V provides a robust solution for medium-length runs with superior voltage drop management.
For large-scale commercial, industrial, or architectural projects requiring extremely long, continuous runs of light, 110V and 220V high voltage strips offer a practical, cost-effective, and efficient solution. However, their use requires strict adherence to safety protocols and professional installation.
By carefully weighing the safety needs, run lengths, and control requirements of your specific application, you can confidently select the perfect voltage to ensure your lighting project is safe, beautiful, and long-lasting.
FAQ
I am building a large channel letter sign. Is it better to wire many 12V modules in series or parallel?
For large sign applications like channel letters, you should almost always wire your 12V or 24V LED modules in parallel, not series. While connecting modules in series is easier (daisy-chaining from one to the next), it causes the voltage to drop across each module. The first module might get 12V, but the last one might only get 9V, causing inconsistent brightness. In a parallel circuit, you run a "home run" power bus (a main positive and negative wire) and tap each module directly to this bus. This ensures each module receives the full 12V/24V supply, guaranteeing uniform brightness across the entire sign.
My old neon sign transformer output 6000V. Can I use it to power these new 12V LED modules?
Absolutely not. Attempting to connect low voltage (12V/24V) LED modules to a high voltage neon transformer (usually 2000V to 15000V) will instantly destroy the LEDs and create a severe fire hazard. LED modules require a constant DC voltage at a very specific low level. You must remove the old transformer and replace it with a proper LED driver or power supply that matches the module's voltage (12V or 24V) and total wattage.
How do I calculate how many 12V LED modules I can put on one power supply?
First, check the wattage of a single module (usually listed in the datasheet, e.g., 1.5W per module). Multiply this by the total number of modules you plan to install to get the total system wattage. Then, apply the 80% rule. For example, if your modules total 80 watts, you need a power supply that can handle at least 100 watts (80W / 0.8 = 100W). This "headroom" prevents the power supply from overheating and extends its life. Never load a power supply to 100% of its capacity.
One of my 24V LED modules stopped working in a string, but the others are still on. Is the power supply broken?
If the other modules are still lit, your power supply is likely fine. This is usually a sign of a "single point of failure" in a parallel-wired system. Because you likely wired them in parallel (as recommended), when one module fails (often due to a bad solder joint or a burnt-out LED chip), it simply acts as an "open" circuit. The power jumps over that module and continues to the rest. You need to inspect the wiring connections on the non-functioning module or check if the module itself is physically damaged. In series wiring, if one goes out, they all usually go dark.
Can I use "indoor" rated LED modules outside if I seal them with silicone?
This is not recommended. LED modules have specific Ingress Protection (IP) ratings. Indoor modules (often non-IP rated or IP20) rely on airflow for cooling. Sealing them in silicone or glue traps heat, which drastically shortens the lifespan of the LEDs. Furthermore, the factory solder points are not designed to resist corrosion. For outdoor use, you must purchase modules specifically rated for wet locations (look for IP65, IP66, or IP67), which have the electronics fully encapsulated in epoxy or silicone from the manufacturer.


