

2025-10-23
How to DIY a Mirror with LED Lights
How to DIY a Mirror with LED Lights?
Decorating a mirror with LED light strips is a simple, economical, and highly effective DIY project. It not only provides you with even, shadow-free lighting, perfect for applying makeup, shaving, or skincare, but also instantly enhances the style and ambiance of your bathroom, bedroom, or entryway. Whether you're going for a minimalist modern look or a cool tech vibe, an LED-lit mirror can meet your needs. This guide will walk you through the process step by step.
1.How to Install LED Strip Lights on a Mirror? - DIY
2.How to Choose the Best LED Strip Lights for Mirrors?
3.Ideal Mirror Placement at Home
4.FAQs
5.Conclusion
How to Install LED Strip Lights on a Mirror? - DIY
Step 1: Planning & Design
Before purchasing materials, plan your desired final look.
1. Light Placement:
- Front of Mirror: Mount the strip on the outer edge of the mirror's frame, shining light directly forward. This is the most common method, maximizing lighting effect and creating visual impact.

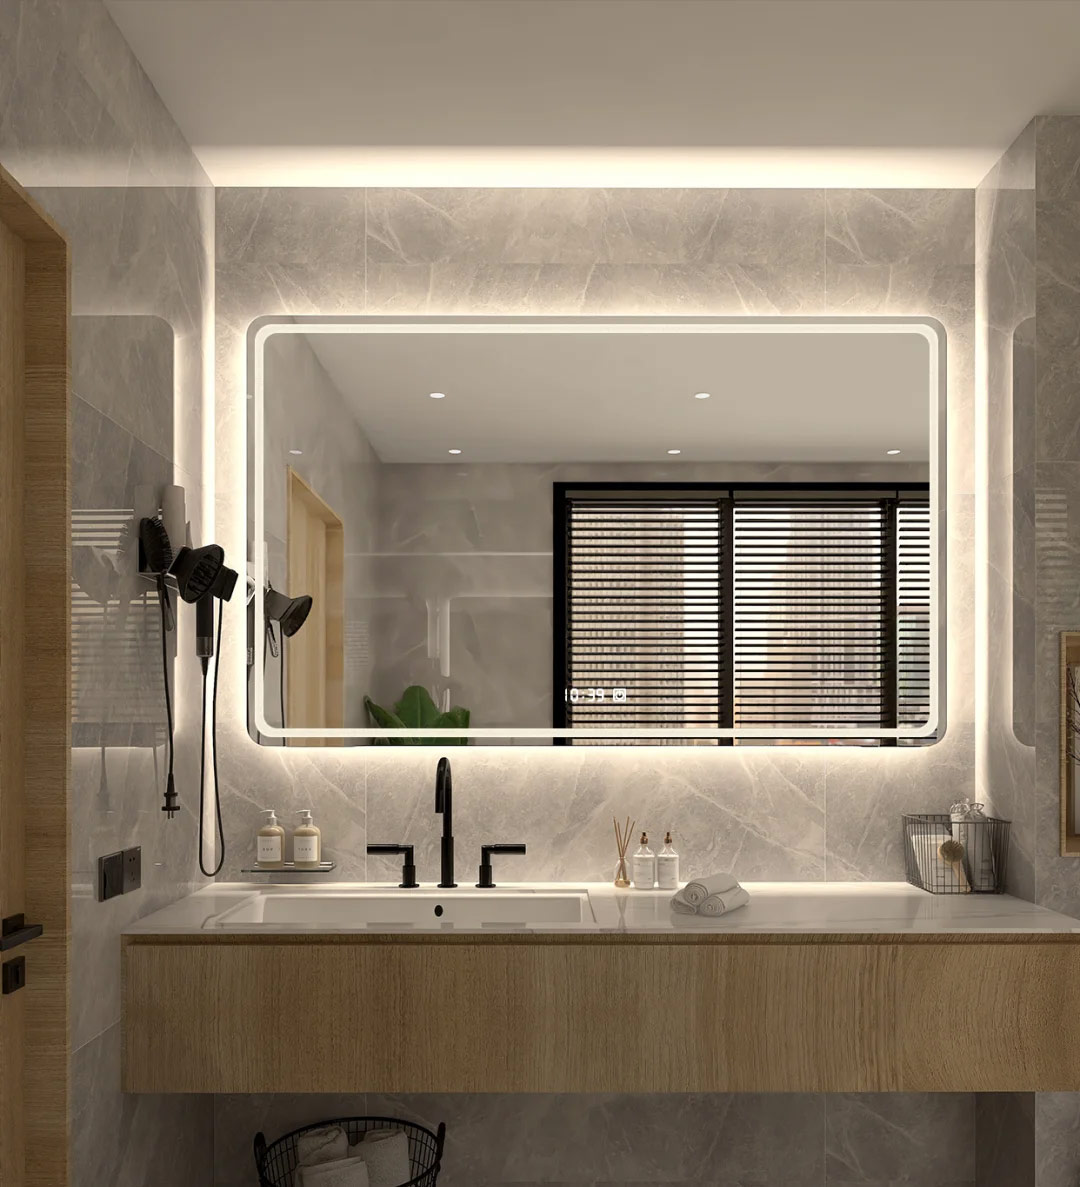
- Back of Mirror: Mount the strip on the back of the mirror, creating a "halo" of light on the wall. This requires your mirror to have some thickness or a gap from the wall. The effect is softer and more atmospheric.

- Side of Mirror Frame: Mount the strip on the side of the frame (if the frame has depth). The effect is a blend of the first two.
2. Power & Switch:
-
Power Source Location: Plan the location of your power outlet in advance. How will you hide the wire or route it neatly to the outlet?
-
Control Method: Simple plug-in/out control? Use the included remote? Or install a wall switch? Smart strips can even connect to phone apps or voice assistants (like Tmall Genie, Xiao Ai, Siri, or Google Assistant).
3. Color & Function:
-
Single Color White: Suitable for functional lighting, like a bathroom mirror. Choose a dimmable version.
-
RGB Color Changing: Perfect for creating ambiance; you can change colors based on your mood.
-
RGBIC: Can achieve more complex effects like color segmentation, dynamic flowing lights, etc.
Step 2: Materials & Tools Needed
Materials:
A mirror (with or without a frame, framed is easier)
LED light strip (Length should be sufficient to go around the mirror)

LED Power adapter ( Ensure its voltage/wattage matches the LED strip)
LED Controller (Usually sold as a set with the strip)
LED Connectors ( For connecting multiple strips or making corners)
Right-angle connectors ( For neater corners)
Aluminum channel with a diffuse cover (Helps with heat dissipation, diffuses light evenly, and provides a professional look)
Tools: Measuring tape| Scissors| Rubbing alcohol wipes or cleaning cloth| Marker| Electrical tape| (Optional) Hot glue gun or double-sided nano tape ( For extra adhesion)
Step 3: Installation Steps
1. Clean the Surface
Thoroughly clean the mirror frame or back where you plan to stick the LED strip with rubbing alcohol wipes. Ensure the surface is free of dust and grease; this is crucial for strong adhesion.
2. Measure & Cut
Measure all four sides of the mirror with a tape measure. Lay the LED strip along the frame and mark where you need to cut. Important: Only cut at the marked scissor symbols on the strip, otherwise you will damage the entire strip.

3. nstall the LED Strip
If using a channel: First, cut the channel to size and attach it to the frame (using glue or screws). Then, snap the LED strip into the channel and finally cover it with the diffuse cover.
If sticking directly: Peel off the 3M adhesive backing. Starting from one corner of the mirror, slowly and steadily press the strip onto the surface. At corners, you can gently bend the strip (mind the minimum bend radius), or use right-angle connectors and cut another strip segment for a perfect look.
If sticking directly: Peel off the 3M adhesive backing. Starting from one corner of the mirror, slowly and steadily press the strip onto the surface. At corners, you can gently bend the strip (mind the minimum bend radius), or use right-angle connectors and cut another strip segment for a perfect look.
4. Connect the Circuit
Follow the instructions to connect the LED strip, controller, and power adapter. Ensure all connections are secure. Before plugging in for a test, double-check that all connections are correct.
5. Power On & Test
*Plug the power adapter into the wall outlet. Turn on the switch or use the remote to test if all LEDs light up and if the colors/functions work properly. This step is crucial and must be done before finalizing all wire management.
6. Manage the Wires
Use cable clips, zip ties, or wire channels to neatly secure any excess wires. You can hide wires behind the mirror or route them neatly along the wall to the outlet, ensuring a clean look.
7. Final Fixing & Enjoy
Ensure all components are securely fixed. Now, you can admire your work! Enjoy your personally crafted, evenly lit, and personalized smart mirror.
Safety Tips & Recommendations
Safety First: Before connecting any wires or plugging in, ensure the power is off.
Waterproof Rating: If the mirror is in a humid environment like a bathroom, choose an LED strip with an appropriate IP rating (e.g., IP65 for water-resistant, IP67 for waterproof).
Don't Overload: Ensure the power adapter's wattage is greater than the total power consumption of the LED strip.
Test Before Finalizing: Emphasized again, always perform a power-on test before final adhesion and concealing all wires.
Get Creative: You don't have to outline the entire mirror. You can also just decorate the top and bottom, or create unique geometric patterns.
How to Choose the Best LED Strip Lights for Mirrors?
1. Installation Environment: IP Rating
Bathroom/Humid Areas: You must choose IP65 or higher (e.g., IP67). This indicates "water jet protected" or "submersible," effectively preventing moisture and splashes for safety.
Bedroom/Dry Areas: IP20 or IP33 is sufficient. They are dust-proof but not water-proof.
2. Core Function: Light Color & Purpose
Functional Lighting: Choose High CRI White Light Strips.
CRI: Choose models with CRI ≥ 90 for true color rendering, perfect for makeup and skincare.
Color Temperature: Choose adjustable color temperature to switch between cool white (5000K+, energizing) and warm white (2700K-3000K, relaxing).
Ambient/Decorative Lighting: Choose RGB or RGBIC strips.
RGB: Can change to many single solid colors.
RGBIC: Can display multiple colors simultaneously on one strip, creating dynamic effects like flowing light and rainbows.
3. Control Method: Convenience & Smart Features
Basic Control: Usually comes with a remote control, which is convenient and quick.
Smart Control: Choose strips with Wi-Fi/Bluetooth support. They can be controlled via a phone app and integrated into smart home systems (e.g., Apple HomeKit, Xiaomi Mijia, Google Home) for voice control (Siri/Xiao Ai) and scene automation.
4. Installation & Aesthetics
Adhesive: High-quality strips should have strong 3M VHB tape on the back for a durable hold.
Professional Choice: Highly recommended to use an aluminum channel with a diffuse cover.
Benefits: Helps dissipate heat (extends lifespan), makes light output even and soft (no glaring hotspots), and gives a cleaner, more professional look.
5. Reliable Brands & Reviews
Choose brands with a good reputation, such as ADLED,Philips Hue, Govee, Yeelight, etc. They typically offer better quality, light effects, and after-sales support.
Before purchasing, always read user reviews, especially regarding brightness, adhesive strength, app stability, and real-world lifespan.
Ideal Mirror Placement at Home
Strategic mirror placement enhances spatial perception and energy flow. Key principles:
1. Entryway
Place adjacent to the front door to expand space and avoid deflecting incoming energy
Allows final appearance check before heading out
2. Living Room
Reflect windows or artwork to boost lighting and visual appeal
Avoid direct alignment with seating areas to prevent discomfort
3. Dining Room
Install on walls beside the dining table to enhance mealtime ambiance and lighting
4. Bedroom
Keep away from the bed (prefer sides or closet interiors)
Never face the bed directly to ensure undisturbed sleep
5. Bathroom
Above the vanity for essential functional lighting
Large mirrors can create openness in small spaces
Universal Rules
Reflect pleasant views or light sources
Maintain clean, intact mirror surfaces
Ensure style and shape harmonize with the room
FAQs
Can you add an LED to a mirror?
Yes,you can add LEDs to a mirror. lf you want built-in mirror lighting,LED strips,LED bulbs,and recessed lights are ideal. However,LEDstrip lights are your best option for DIY mirror lighting.
Are LED lighted mirrors bright enough?
LED lighted mirrors are bright enough or not depending on the LEDs used in the mirror. You should use high-lumen-rated bulbs for bright lighting. However, using an LED controller, you can adjust its brightness.
Are mirrors with LED lights good?
MirrorwithLEDsprovidespropervisibilitywhiledoingyour makeup,skincare,orhairstyles.So undoubtedly, mirrors with lights are good.
What is the difference between backlight and LED mirrors?
LED mirrors have built-in light that usually glows from the front of the mirror rather than the back part. But backlit mirrors havea lightinstalled on the back side of the mirror. These lights need to be
mounted in the wall, keeping a minimal distance to get the backlit effect.
Conclusion
DIYing a smart mirror with LED lights is a practical project that enhances both functionality and ambiance. The core process is straightforward: plan the light placement (front for task lighting or back for a halo effect) and control method; gather materials like a mirror, LED strip, and power supply; during installation, thoroughly clean the surface, measure and cut the strip precisely, and apply it smoothly from a corner, handling bends carefully. After connecting the circuit, always test it before finalizing wire management. This low-cost project achieves professional, shadow-free lighting ideal for makeup or skincare, while instantly creating a modern, tech-savvy vibe. Remember safety: choose an appropriate IP rating for damp areas and avoid overloading the power supply.