

LED Lights For Light Box 12V 24V 18LEDs 3030 Edge Lit LED Bar
ADS-N3030-18
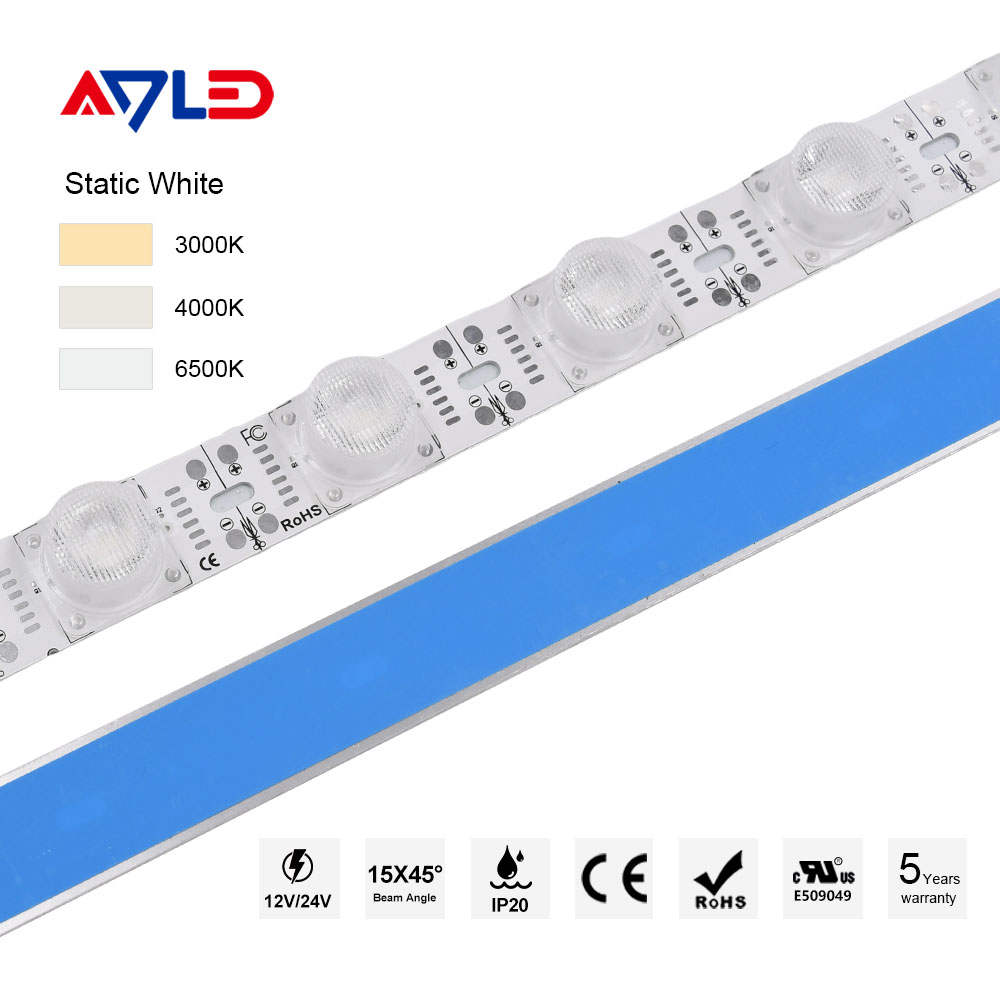
3030 Edge Lit LED Bar, 12V/24V, 18LEDs, 28.8W/M, IP20, 15x45°, Constant current, Single Color 3000K/4000K/6500K, CE RoHS UL FCC Listed.
Quantity
Professional LED Lights For Light Box Manufacturer & Supplier
Enhance your displays with our premium rigid light bar solutions. As a top side lighting manufacturer, we offer high-performance rigid light bar units engineered for exceptional illumination. These rigid light bar products are ideal for various applications requiring focused or edge lighting. Whether you need side emitting LED strip configurations for specialized effects, versatile 12v light bar options for lower voltage systems, or striking edge lit LED bar displays for impactful signage, our selection provides comprehensive solutions. Our rigid light bar units feature uniquely designed lenses to optimize light distribution and achieve the best possible light box illumination. We also offer customization options to meet your exact specifications. Backed by a 5-year warranty, our rigid light bar solutions provide reliable, high-quality lighting for years to come. Choose our rigid light bar for superior performance, customizable options, and long-lasting reliability.

18LEDs 12V 24V Constant Current LED Lights For Light Box
LED Lights For Light Box Specifications
Code | LED Type | LED QTY | Voltage | Watts | Color | Beam angle | Driven Mode | Size | Warranty |
ADS-N3030-18WW | 3030 | 18LEDs | DC12V /24V | 28.8W | 3000K | 15x45° | Constant Current | 990x25x16mm | 5 years |
ADS-N3030-18NW | 4000K | ||||||||
ADS-N3030-18W | 6500K | ||||||||
| ADS-N3030-18CW | 10000K |

LED Lights For Light Box Dimensions
DC12V Each lamp can be cut,Length can be customized.

DC24V Each 2 lamps can be cut,Length can be customized.

LED Lights For Light Box Features
• Powered by Epistar chip 9V SMD3030 LED
• DC24V low-voltage power supply
• Aluminium base for good heat sinking
• 990mm or customized length

LED Lights For Light Box
As a pioneer in lightbox solutions, we are the first company to research and manufacture rigid light bar technology—delivering unmatched illumination results. Our cutting-edge LED lights for light box are designed to provide uniform brightness with optimal visual impact. Featuring edge lit LED bar and side emitting LED strip options, we offer precise lighting control for both standard and slim designs. Our 12V light bar solutions ensure safe, energy-efficient operation across various applications. Whether you're using LED lights in box signage or need high-performance double sided LED modules, our custom-engineered products with unique lens designs guarantee superior light diffusion and performance.

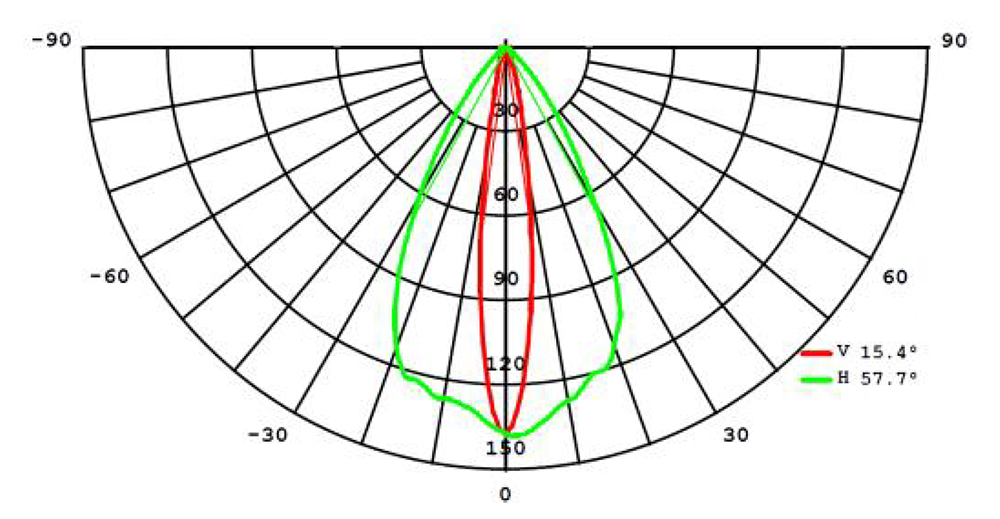
LED Lights For Light Box Distribution Graph
LED Lights For Light Box Application
light box sign
display light box
light box business signs
LED light box poster frames
light box LED lights
double sided LED light box
double sided light box sign
outdoor double sided light box sign
frameless LED light box
LED light boxes wholesale
lighted outdoor sign box
seg light box display
edge lit LED light box
pop up light box display
display light box
light box business signs
LED light box poster frames
light box LED lights
double sided LED light box
double sided light box sign
outdoor double sided light box sign
frameless LED light box
LED light boxes wholesale
lighted outdoor sign box
seg light box display
edge lit LED light box
pop up light box display

LED Lights For Light Box Installation

LED Lights For Light Box Certificate

LED Lights For Light Box FAQ
How to build a lighted sign box?
Step 1: Plan Your Design
Determine the size, shape, and application (indoor/outdoor, single-sided or double-sided).
Choose your materials: aluminum frame, acrylic face, LED lights for light box, etc.
Step 2: Choose the Right LED lights for light box
For slim or shallow boxes, use edge lit LED bar or side emitting LED strip for uniform brightness.
For deeper boxes, use rigid light bar or SMD LED modules for front and back illumination.
Consider voltage: 12V light bar is commonly used for safety and compatibility.
Match the light source with your graphics for ideal light output.
Step 3: Prepare the Frame
Assemble the aluminum or metal frame with grooves to hold the acrylic face and back panel.
Ensure proper ventilation or waterproofing based on usage.
Step 4: Install LED Lights for light box
Attach LED lights for light box on the frame or base:
For side-lighting, install edge lit LED bar on the inner sides.
For back-lighting, mount rigid light bar evenly across the back panel.
Use aluminum profiles or mounting clips for neat installation.
Step 5: Wire the Power Supply
Connect the LED lights to a compatible LED driver or power supply (e.g., 12V or 24V).
Ensure connections are secure and waterproof if used outdoors.
Step 6: Add the Face and Back Panel
Insert the acrylic or fabric face with your printed graphics.
Secure the back panel or use a translucent material for double-sided signs.
Step 7: Test the Lighting
Power on the sign box and check for even brightness, no hot spots, and stable operation.
Determine the size, shape, and application (indoor/outdoor, single-sided or double-sided).
Choose your materials: aluminum frame, acrylic face, LED lights for light box, etc.
Step 2: Choose the Right LED lights for light box
For slim or shallow boxes, use edge lit LED bar or side emitting LED strip for uniform brightness.
For deeper boxes, use rigid light bar or SMD LED modules for front and back illumination.
Consider voltage: 12V light bar is commonly used for safety and compatibility.
Match the light source with your graphics for ideal light output.
Step 3: Prepare the Frame
Assemble the aluminum or metal frame with grooves to hold the acrylic face and back panel.
Ensure proper ventilation or waterproofing based on usage.
Step 4: Install LED Lights for light box
Attach LED lights for light box on the frame or base:
For side-lighting, install edge lit LED bar on the inner sides.
For back-lighting, mount rigid light bar evenly across the back panel.
Use aluminum profiles or mounting clips for neat installation.
Step 5: Wire the Power Supply
Connect the LED lights to a compatible LED driver or power supply (e.g., 12V or 24V).
Ensure connections are secure and waterproof if used outdoors.
Step 6: Add the Face and Back Panel
Insert the acrylic or fabric face with your printed graphics.
Secure the back panel or use a translucent material for double-sided signs.
Step 7: Test the Lighting
Power on the sign box and check for even brightness, no hot spots, and stable operation.


/5