2025-04-18
How To Produce LED Strip Lights?
LED strip lights have revolutionized the way we illuminate and decorate spaces. Their flexibility, energy efficiency, and vibrant colors have made them a favorite for everything from accent lighting in homes to dazzling commercial displays. But have you ever wondered how these versatile lighting solutions are actually made? Join us as we take an in-depth journey into the fascinating manufacturing process of LED strip lights, uncovering the steps involved in bringing these luminous LED strip lights to life.
Table of Contents
1. What is LED Strip Light?
2. Main Components of LED Strip Light
3. LED Strip Light Design and Research & Development
4. Features of LED Strips
5. LED Strips are Generally Divided into the Following Categories:
6. LED Strip Lights Manufacturing Process
7. Differences Between Manufacturing SMD and COB LED Strips
8. Factors Affecting the Quality of LED Strip Lights
9. Common Problems and Solutions for LED Strip Lights
10. Environmental and Safety Requirements for LED Strip Lights
11. Conclusion
1. What is LED Strip Light?
LED strip light, also known as an LED tape light or LED ribbon light, is a flexible circuit board populated with surface-mounted light-emitting diodes (SMDs) and other electronic components. Typically backed with an adhesive LED strip lights, they can be easily mounted on various surfaces. Their low profile, flexibility, and ability to be cut to specific lengths make them incredibly versatile for a wide range of lighting applications. COB LED strip light refers to Chip-on-Board (COB) LED strip lighting, a new generation of LED technology where multiple LED chips are directly mounted onto the LED strip’s surface, creating a continuous, dot-free line of light.
2. Main Components of LED Strip Light
Several key components work together to create a functional LED strip light:
-
LED Chips (SMD / COB)
These are the light-emitting diodes themselves, responsible for producing the light. They come in various sizes, colors, and brightness levels.
-
Flexible Circuit Board (PCB)
This thin, flexible substrate provides the electrical pathways to connect the LEDs and other components. It's typically made of copper traces laminated onto a flexible insulating material.
-
Resistors
These electronic components regulate the current flowing through the LEDs, ensuring they operate within their specifications and preventing damage.
-
Capacitors (Optional)
Some LED strip lights include capacitors for smoothing the DC voltage and reducing flicker.
-
Integrated Circuits (ICs) (for Smart LED Strips)
For addressable or color-changing LED strip lights, ICs control individual LEDs or groups of LEDs, enabling complex lighting effects.
-
Connectors (Optional)
Some LED strip lights come with pre-installed connectors for easy linking or connection to power supplies.
-
Adhesive Backing
Usually a double-sided 3M tape, this allows for easy and secure mounting on various surfaces.
-
Waterproof Coating (Optional)
For outdoor or damp environments, LED strip lights may be coated with silicone or epoxy to provide protection against moisture.
3. LED Strip Light Design and Research & Development
The journey of an LED strip light begins long before the assembly line. It starts with meticulous design and thorough research and development:
-
LED Light Strip Design and R&D
This stage involves determining the desired light output (lumens), color temperature (Kelvin), color rendering index (CRI), beam angle, power consumption, and overall aesthetic. Engineers use specialized software to design the circuit layout, optimize heat dissipation, and select appropriate LED chips and other components. Factors like flexibility requirements, cutting intervals, and intended applications are also carefully considered.
-
Raw Material Procurement
Once the design is finalized, the next crucial step is sourcing high-quality raw materials. This includes selecting reliable LED chip manufacturers, procuring flexible PCBs with appropriate copper thickness, sourcing precise resistors and capacitors, and choosing durable and effective adhesive tapes and waterproofing materials. Strict quality control measures are implemented during this stage to ensure the incoming materials meet the required specifications.
-
Production Equipment Preparation
Setting up the production line involves preparing sophisticated machinery. This includes:
1. Solder Paste Printing Machines
For precisely applying solder paste onto the PCB.
2. Pick and Place Machines
High-speed robots that accurately place the tiny LED chips and other components onto the solder paste.
3. Reflow Soldering Ovens
Controlled heating chambers that melt the solder paste, creating permanent electrical and mechanical connections between the components and the PCB.
4. Wire Bonding Machines (for COB)
Specialized equipment used in COB (Chip-on-Board) technology to directly connect the LED chips to the substrate.
5. Extrusion Machines (for Waterproofing)
For encasing the LED strip lights in silicone or other waterproof materials.
6. Aging Test Racks
For subjecting the finished LED strip lights to prolonged operation to identify any early failures.
7. Testing Equipment
For evaluating electrical performance, light output, color accuracy, and other critical parameters.
8. Cutting and Welding Machines
For processing the assembled LED strip lights into desired lengths and connecting segments.
9. Packaging Machines
For preparing the final product for shipment.
4. Features of LED Strips
The popularity of LED strip lights stems from their numerous advantageous features:
-
Flexibility
Can be easily bent, shaped, and installed in tight spaces.
-
Cuttable
Can be cut to specific lengths at designated cutting points.
-
Adhesive Backing
Simplifies installation on various surfaces.
-
Energy Efficiency
Consume significantly less power than traditional lighting.
-
Long Lifespan
LEDs offer a much longer operational life.
-
Variety of Colors
Available in single colors, RGB, and addressable RGB options.
-
Dimmable
Brightness can often be adjusted with compatible controllers.
-
Low Heat Emission
Produce very little heat, making them safer to touch and install near heat-sensitive materials.
-
Compact Size
Their slim profile allows for discreet installation.
5. LED Strips are Generally Divided into the Following Categories
-
Color
Single Color (e.g., warm white, cool white, red, blue), RGB (Red, Green, Blue), RGBW (Red, Green, Blue, White), Addressable RGB (IC controlled).
-
LED Density
The number of LEDs per meter (e.g., 30 LEDs/m, 60 LEDs/m, 120 LEDs/m). Higher density generally results in a more uniform light output.
-
Voltage
Typically 12V or 24V DC.
-
Waterproof Rating (IP Rating)
Non-waterproof (IP20), Splash-proof (IP44), Waterproof (IP65, IP67, IP68).
-
LED Type
SMD (Surface Mount Device) in various sizes (e.g., SMD2835, SMD5050), COB (Chip-on-Board).
-
Application
Cabinet, shelving, commercial, architectural, shop fitting, ceiling, wall, display, signage, behind a TV, artwork, furniture, under kitchen cabinets for countertops, garden lighting, patio decoration, cosplay, car lighting, DIY electronics.
![]() |
![]() |
![]() |
Cabinet & Shelving |
Commercial |
Architectural |
![]() |
![]() |
![]() |
Shop Fitting |
Ceiling & Wall |
Display & Signage |
6. LED Strip Lights Manufacturing Process
The manufacturing of LED strip lights is a multi-step process that requires precision and quality control at each stage:
-
Step 1: LED Lamp Production
This initial stage involves the production of the individual SMD or COB LED packages. This includes die bonding (attaching the LED chip to a lead frame), wire bonding (connecting the chip to the leads with thin wires), encapsulation (protecting the chip with epoxy or silicone), and testing. These individual LED lamps are then shipped to the LED strip light assembly factory.
-
Step 2: Create and Use Solder Molds (Stencils)
A solder stencil, typically made of thin stainless steel with precisely etched openings corresponding to the pads on the PCB where components will be placed, is created. This stencil will be used to accurately apply solder paste.
-
Step 3: Apply Lead-free Solder Paste Onto the Base PCB
The flexible PCB is placed on the assembly line, and the solder stencil is carefully aligned on top. A solder paste printing machine then spreads a precise amount of lead-free solder paste through the openings in the stencil onto the PCB pads.
-
Step 4: Component Placement
High-speed pick and place machines, equipped with vacuum nozzles, pick up the tiny LED chips, resistors, capacitors, and ICs from their feeders and accurately place them onto the pads with solder paste on the PCB. These machines operate at incredible speeds and with high precision.
-
Step 5: Reflow Soldering
The PCB with the placed components is then conveyed through a reflow soldering oven. This oven has multiple temperature zones that precisely control the heating and cooling process. The solder paste melts, wetting the component leads and the PCB pads, and then solidifies as it cools, creating permanent electrical and mechanical connections.
-
Step 6: Separate and Weld the 0.5m LED Strip Segments Together (if applicable)
LED strip lights are often manufactured in longer reels and then cut into smaller, more manageable segments (e.g., 0.5 meters) for easier handling during the assembly process. These segments may then need to be welded together using automated soldering machines to create longer continuous LED strips.
-
Step 7: Aging and Waterproofing:
Aging Test: The assembled LED strip lights are subjected to an aging test, where they are powered on for an extended period (e.g., 4-24 hours) under normal operating conditions. This helps to identify any components that may fail early.
Waterproofing (if required): For waterproof LED strip lights, various methods are employed:
Silicone Coating/Extrusion: The entire LED strip light is encased in a flexible silicone layer.
Epoxy Encapsulation: A layer of epoxy resin is applied to the surface of the LED strip lights, covering the components.
Hollow Silicone Tube: The LED strip light is inserted into a hollow silicone tube, and the ends are sealed.
-
Step 8: 3M Tape Pasting and Packaging:
Finally, the double-sided 3M adhesive tape is applied to the back of the LED strip lights. The finished LED strip lights are then cut to the required lengths, wound onto reels or placed in bags, and packaged for distribution. Quality control checks are performed throughout the entire manufacturing process, including final inspection before packaging, to ensure the LED strip lights meet the required standards.
7. Differences Between Manufacturing SMD and COB LED Strips
While the fundamental steps are similar, there are key differences in the manufacturing of SMD and COB LED strip lights:
|
Feature
|
SMD LED Strips
|
COB LED Strips
|
|
LED Packaging
|
Individual LED packages (SMDs) are pre-manufactured.
|
LED chips are directly bonded to the PCB (no individual package).
|
|
Wire Bonding
|
Wire bonding occurs during the SMD package production.
|
Wire bonding occurs directly on the PCB.
|
|
Phosphor Coating
|
Phosphor is applied during SMD package production.
|
Phosphor is directly applied over the multiple chips on the PCB.
|
|
Chip Fixing
|
solder the LED lamp beads to the PCB through the SMT placement machine
|
directly bond the bare chip to the substrate through the die bonding process (without packaging shell)
|
|
Welding method
|
Reflow soldering process (high temperature curing solder joints)
|
Secondary packaging required (covered with fluorescent glue + silicone protective layer)
|
|
Manufacturing Complexity
|
More steps involved due to pre-packaged LEDs.
|
Fewer steps related to individual LED packaging.
|
|
Waterproof treatment
|
Requires additional glue injection or casing (such as IP65)
|
Encapsulation glue layer is inherently waterproof (process simplification)
|
8. Factors Affecting the Quality of LED Strip Lights
Maintaining high quality is paramount in LED strip light manufacturing. Rigorous testing and inspection are conducted at various stages:
-
Incoming Quality Control (IQC)
Inspection of all incoming raw materials (LED chips, PCBs, resistors, etc.) to ensure they meet specifications.
-
In-Process Quality Control (IPQC)
Monitoring and inspection during the various stages of production (solder paste printing, component placement, reflow soldering, etc.) to identify and correct any issues early on.
-
Outgoing Quality Control (OQC)
Final inspection of the finished LED strip lights before packaging and shipment, checking for electrical functionality, light output, color accuracy, and physical defects.
-
Extreme Environment Testing:
Salt Spray Test: To evaluate the corrosion resistance of the materials.
Tensile Test: To assess the strength and durability of the LED strip lights.
Bending Test: To check the flexibility and resistance to damage from bending.
Constant Temperature and Humidity Test: To evaluate performance under extreme temperature and humidity conditions.
Thermal Shock Test: To assess the ability to withstand rapid temperature changes.
Drop Test: To evaluate the resilience to physical impacts during handling and transportation.
-
ADLED Unique Reel Test:
(As described) After the LED strip light is produced and reeled, it is unspooled, powered on, re-tested, and re-reeled. This additional step ensures that any issues that may have occurred during the reeling process are identified before shipment.
9. Common Problems and Solutions for LED Strip Lights
Despite stringent quality control, some common issues can arise with LED strip lights:
-
Light Strip Not Lighting Up:
Problem: Incorrect power supply voltage, loose connections, damaged LED strip lights, faulty power adapter.
Solution: Verify power supply voltage matches the LED strip's requirement, check all connections are secure, inspect the LED strip light for any visible damage, test the power adapter with another compatible device.
-
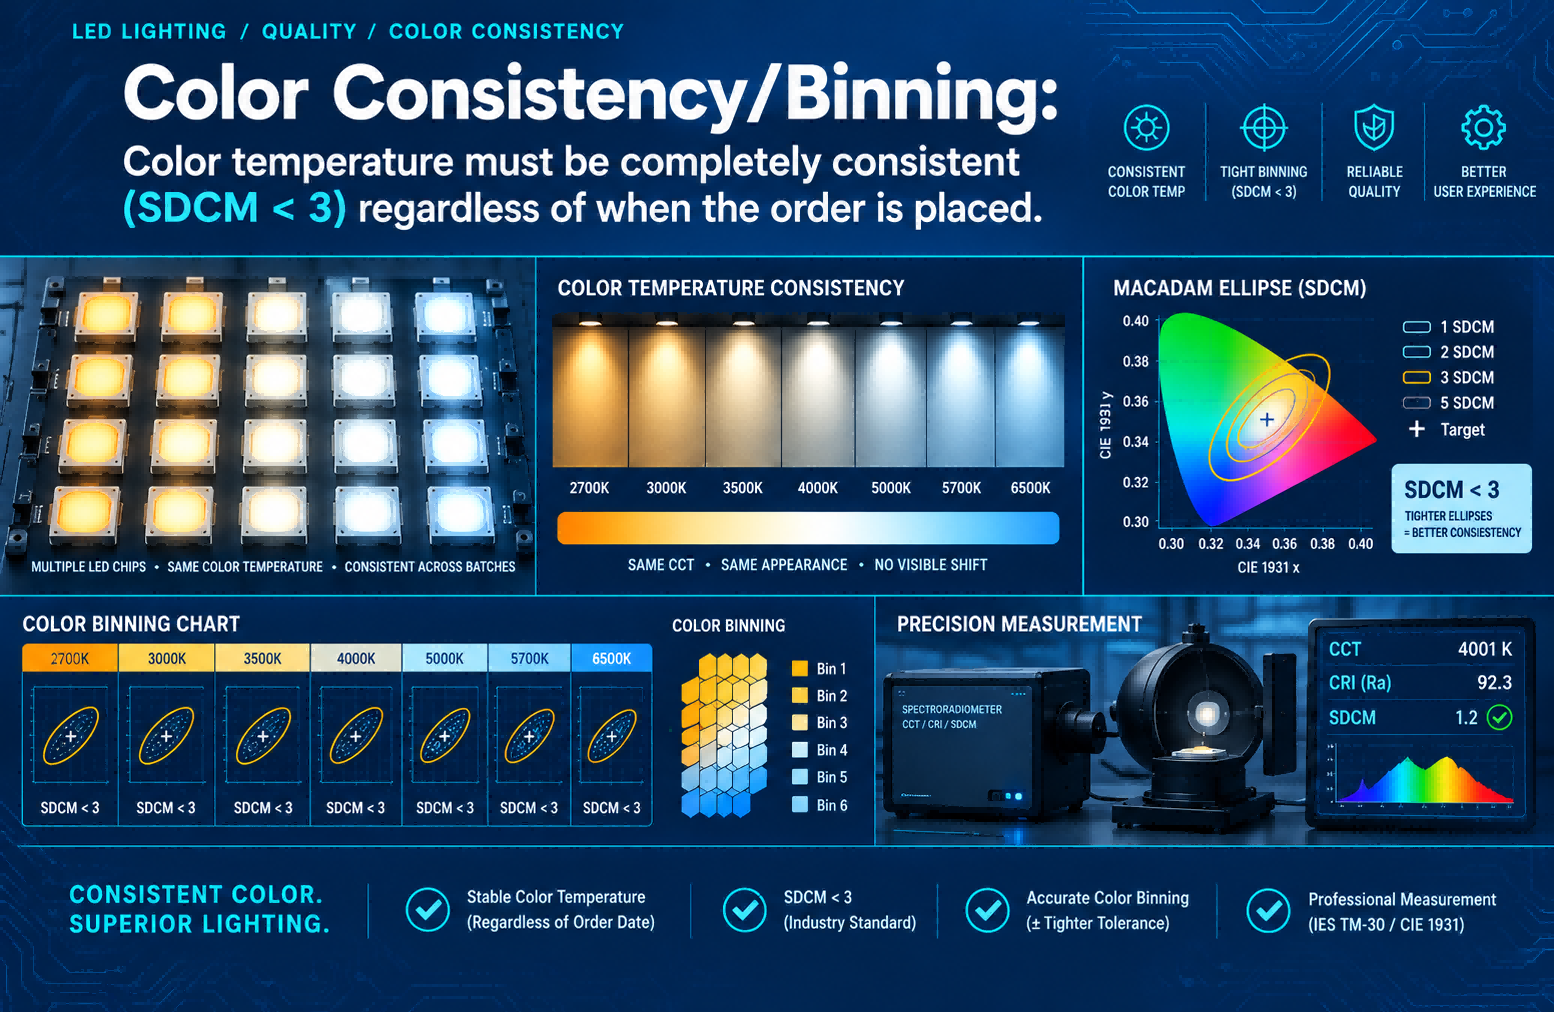
Inconsistent Color Temperature:
Problem: Use of LEDs from different bins (variations in manufacturing), voltage drop along long LED strip lights.
Solution: Ensure all LEDs in a single installation come from the same bin, use constant current LED strips or amplifiers for long runs to mitigate voltage drop.
-
Waterproofing Failure:
Problem: Damaged waterproof coating, improper sealing of connections.
Solution: Handle waterproof LED strips carefully to avoid damaging the coating, ensure all connectors and end caps are properly sealed when used in wet environments.
10. Environmental and Safety Requirements for LED Strip Lights
Modern LED strip light manufacturing adheres to various environmental and safety standards:
-
RoHS Compliance: Restriction of Hazardous Substances directive, which limits the use of harmful materials like lead, mercury, and cadmium.
-
REACH Compliance: Registration, Evaluation, Authorisation and Restriction of Chemicals, addressing the safe use of chemical substances.
-
CE Certification: Indicates conformity with European health, safety, and environmental protection standards.
-
UL Certification: Indicates compliance with safety standards set by Underwriters Laboratories in North America.
-
Energy Efficiency Standards: Compliance with energy efficiency regulations to minimize power consumption.
11. Conclusion
The production of LED strip lights is a complex process involving intricate design, careful material selection, sophisticated manufacturing techniques, and rigorous quality control measures. From the initial LED chip production to the final packaging, each step plays a crucial role in creating the versatile and reliable lighting solutions we use every day. Understanding this process highlights the engineering and precision that goes into illuminating our world with these flexible and vibrant light sources.